Have a t-shirt that needs a little make over? Here is all you have to do.

If you read this post, you realize that I had a partially ruined purple shirt that I didn't know what to do with. So, after mulling over that problem for a couple days, I decided to re-make it into something wearable for Chloe. A craft fail to a craft fashion, if you will.
The easiest item to make would be a tank top or tank dress. I wanted to do the least amount of sewing that I could get away with. After sketching a few ideas, I decided on this style that I had made for Chloe before. I'll mention right now that this was my first time sewing knits, and could tell almost immediately that something wasn't right. The material would get all bunched up under the needle. Some quick internet research revealed a special "stretch" needle is required to sew knits. Ah.
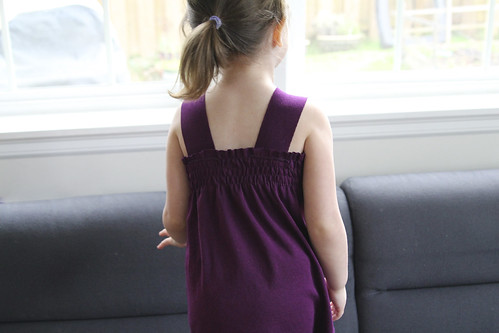
After returning from the craft store with a pack of "stretch" needles, I hesitantly began again. As long as I took things nice and steady it worked great. And now Chloe has a super cute tank top to wear this summer. I couldn't be happier with the result. Yay! Craft Fail to Craft Re-fashion!
Have a t-shirt that needs a little make over? Here is all you have to do.

What you need:
T-shirt
Matching color thread
Elastic thread
Sewing machine
Scissors
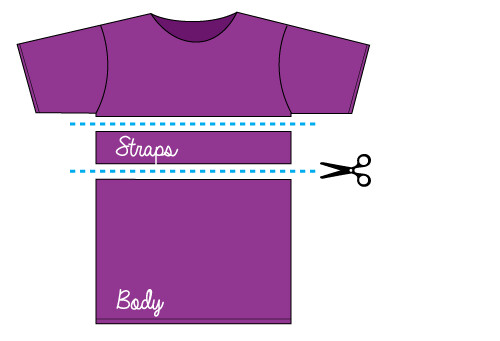
- Cut your shirt. One straight horizontal cut right beneath the arm pits and then another straight cut about two inches below the first cut. The bottom piece will be the body of the tank top and the piece above that will be for your straps.
- Wind your bottom bobbin with the elastic thread by hand and insert it into your machine. Excellent directions on how to do this can be found here. Thread your matching color thread on top.
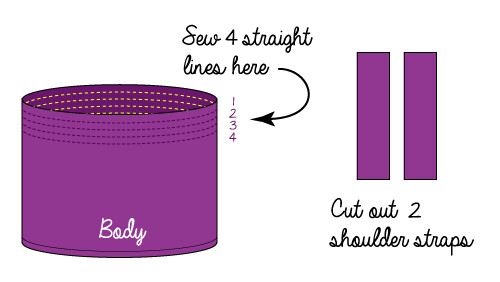
- Starting at a side seam on the body piece, sew a straight line horizontally one-half inch from the raw edge. Sew all the way around until you are back where you started and backstitch at the beginning and end (alternately, you can tie the elastic together where the ends meet). Repeat this step 3 more times, a half inch below each previous line.
- Steam your stitches with an iron -or- mist with water and gently and quickly press with a hot iron. This will cause the elastic to draw together, giving that puckered, shirred or "smocked" look. (If your girl is small like mine, you may need to stitch once more down a vertical side to take in some of the width).
- Replace your elastic bottom bobbin with regular thread. Using your little model (in this case, it was Chloe), measure and pin the shoulder straps in place and stitch them on. I used a zig-zag stitch here for stretch.
To make the rosette: I followed a couple different directions online, but basically, the rosette shown is a lot like this video except I made two layers - a larger bottom layer and a smaller top layer (the rosette was an after thought - you'll have to cut your fabric strips from the leftover neckline piece). Another interesting rosette tutorial can be found here and here. I pinned ours on with a safety pin, so I can pop it off and onto something else, if we want.

And that's it! Chloe loves it and so do I. It is almost like it was meant to be. Maybe failing isn't so bad after all. What do you think?
And here is one final photo of that face I love so much. My little sweetheart.

If, at first, you don't succeed, try, try again. - Old proverb


